Hello, I am Kate. Today, I’m gonna show you how to make authentic aglio, olio, e peperoncino recipe. Never miss a recipe of the day again. Here are our most recent very simple family recipes to try. This time, I will make it a little bit tastier. This is gonna smell and look delicious. Not to mention, it’s super satisfying.
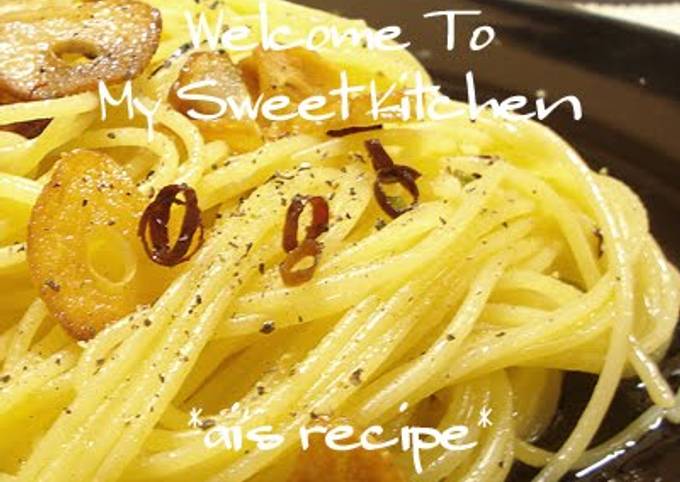
Authentic Aglio, Olio, e Peperoncino Recipe
Authentic Aglio, Olio, e Peperoncino is one of the most well liked of current trending foods in the world. It’s easy, it is fast, it tastes yummy. It’s appreciated by millions daily. They are nice and they look fantastic. Authentic Aglio, Olio, e Peperoncino is something which I’ve loved my entire life.
To be with this particular recipe, we must first prepare a few ingredients. You can cook authentic aglio, olio, e peperoncino using 10 ingredients and 19 steps. Here is how you cook that.
The ingredients needed to make Authentic Aglio, Olio, e Peperoncino:
- Prepare 100 grams Long pasta (1.4 to 1.6 mm thick is best)
- Get 45 ml A. Extra vir olive oil
- Take 1 to 2 small cloves A. Garlic (sliced thinly or fnely chopped)
- Take 1 Red chili peppers (sliced into rounds)
- Get 10 ml B. Garlic oil(or substitute with extra vir olive oil)
- Prepare 40 ml B. Water
- Make ready 1 bit less than 1/2 teaspoon B. Cake flour
- Take 1 Black pepper (whole or coarsely ground)
- Prepare 3 liter C. Water
- Get 35 ml (2 tablespoons + C. Salt
Instructions to make Authentic Aglio, Olio, e Peperoncino:
- Bring the C. water (the pasta water) to a boil in a large pot. Just before the water comes to a boil, add the C. salt, measuring it out properly.
- Normally you would use 1% salt water (1 tablespoon of salt to 1.5 liters of water), but this time a little more salt is added.
- Adding a generous amount of salt to the pasta water, makes it easier for everyone to easily produce great tasting pasta (Tip 1).
- Combine the B. ingredients and mix until there are no more flour lumps (Tip no. 2 / See Step 12 for details).
- Put the A. ingredients in a cold frying pan. Cook over low heat to slowly transfer the flavor and fragrance of the garlic to the oil (Tip 3.).
- When the garlic oil in Step 5 is getting bubbly and fragrant, add the red chili pepper before the garlic starts to change color.
- If you are using , add it when you are cooking the garlic. For crispy , add it at the bening; for softer add it midway through onwards.
- While the garlic and oil (and optional ) are cooking, cook the pasta in the water you heated in Step 1, for 30 seconds to a minute less than indicated on the package. Cook over low heat.
- If you cook the pasta in rapidly boiling water, the water will evaporate and become saltier, and your pasta will get salty too. So cook the pasta over low heat (Tip 4).
- Note: Make sure the pasta water doesn’t come to a rolling boil before or after adding the pasta.
- When the garlic in the frying pan from Step 6 turns a light beige color, turn off the heat. Make sure not to burn the garlic.
- Just before the pasta is cooked, put the Step 4 flour-water mixture into the Step 11 frying pan. Turn the heat up to medium, and swirl the pan around for about 15 seconds.
- Important: As soon as the mixture in the frying pan becomes thick (which means it has emulsified), turn off the heat.
- When you are making an oil-based pasta dish, the emulsification is very important. In restaurants this is provided via the pasta cooking water, which is thick because so much pasta is cooked in it. But in a home environment you only cook a little pasta at a time so the water doesn’t get thick.
- By adding cake flour to the oil, it gets emulsified much easier. It’s a small detail, but to achive a restaurant-like result it’s important.
- Normally you can just add cake flour to some of the pasta water, but in this recipe the pasta water is higher in salt than usual, so plain water and flour are mixed to maintain just the right degree of saltiness.
- When the pasta is cooked, set the frying pan from Step 12 back over low-medium heat, and add the drained pasta.
- Mix quickly so that the pasta is evenly coated with the oil.
- Transfer to a serving plate, grind on some black pepper, and enjoy I think the seasoning should be just right without any adjustments needed at the end.
So that’s going to wrap this up for this distinctive dish authentic aglio, olio, e peperoncino recipe. Thank you very much for your time. I’m confident you will make this at home. There is gonna be interesting food at home recipes coming up. Remember to bookmark this page on your browser, and share it to your family, friends and colleague. Thank you for reading. Happy cooking.